On a four-stroke Dirt Bike, a grime carburetor prevents fuel from entering the engine, meaning no starts or if you are lucky and turn the engine off, it sputters and bites the dust quickly.
The comparison often happens with a sloppy air channel, but the stopped air channel is a correct indicator of air into the engine instead of a defective liquid.
Therefore, the air canal is tested before the wider cleaning company Carburetor when these
secondary effects occur. Use dependent energetics in the dirt bike, and the bike would usually have issues with the Carburetor.
It is a wise decision to use significant gas regularly and drive or take a remedy such as stabilization while petrol left in the tank for long distances.
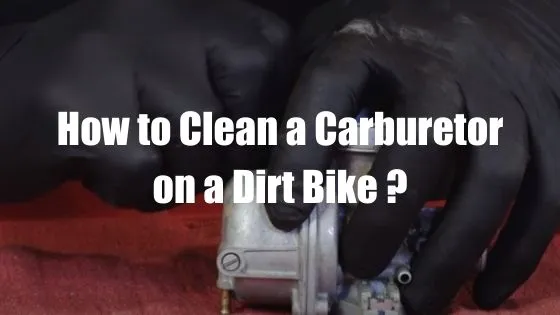
To clean carburetor you need to gather some tools for executing this process such as rags, cleaning fluid, screwdriver, wrench, compressed air, thread locker, etc and follow the disassemble process to reach the inner part of the carburetor and use these tools step by step.
By the way, a long-term carburetor needs to clean in the event you are not allowed to use
non-ethanol fuel (hard to obtain in different territories) nor to function with clocks while siphoning race gas and riding regularly. Only once in a year, you have to stay stable over the operation.
Excuse me, and There is a simple way out. All available fuel cleaning substances can include, but it is only cash down the channel or perhaps petrol. The Carburetor stays gritty and dirty until it is washed out.
If facing low compression and your query is Why does my dirt bike have low compression? then this article is helping you sort out this problem.
Tools Required:
Before you continue, get together the accompanying stuff. You can do without anything, but it’s perfect if you find anything you don’t have.
- Service Manual
- Rags
- Carburetor Cleaning fluid
- Hex Key/Allen Wrench
- Screwdriver
- Little Screwdriver
- Attachment Wrench
- Wrench
- Compressed Air
- Low/Medium Strength Thread Locker
The Service manual is the most critical of these items. There are many different types of bikes and quads, so every Carburetor is exceptional.
While this instruction is equivalent to your computer, it will not be the same. The administration manual supervises the distinctions.
The scope of the tools you require will show in your administrative manual.
Dismantle and clean of Carburetor
Note that gasoline is highly combustible when shooting at the fuel system, and extreme care should take to prevent sparks or blaze during the fuel system.
If you are convinced the Carburetor does not work as it should, the means below will detail what you have to do to overhaul the Carburetor better.
Although most of the carburetor modifications or sections need to clean can only be reached by lowering the intake brake without removing the Carburetor from the bike.
Beginning with the carburetor redesign, remember that you accurately advise washing your dirt bike in advance before taking a shot on the inlet road.
You will remove the carburetor from the dirt bike with a proper cruiser.
If you are not in a rush to complete it, it does never damage the removal (if removable) of the carburetor, gas tanks and subframes.
To guarantee unconfined entry because it also takes into account an assessment of the connection and steering of the fuel tank to ensure that they do not taunt.
The initial step to the Carburetor decommissioning with the Carburetor Accessible will be the removal of the carburetor top and slip-on two strokes from the main body, or contacts from pulleys on four strokes.
On a two-stroke, either by unfurling top or by separating two coils, removal of the head by bolt, slip, and needle as alignment is possible.
It is true. A plastic dispersion covering the contact concentration or linkage may occur on a four-stroke. If this not achieved, the dismantling/remobilization and replacement of throttle connections are assured.
With the Carburetor’s highest point evacuated on four-stroke, ensure the vent and flood hoses are transparent, and the fuel line is isolated from each other, the carburetor clamp entry relief is relaxed, and the pedal expelled.
Instead, you will need to remove the fuel from the boot bowl to avoid a crash during deconstruction.
If you know it, you are most likely having trouble with the Carburetor or are concerned about dirty fuel so you must be confident that the fuel will be exhausted in the bowl for examination.
The ideal way to deplete fuel is a loop fuel tank at the base of the bowl of a carburetor, loosen channel screw-on bowl of carburetor burner or turn around the Carburetor for the fuel to fall short of the tubes of the stream.
Please note: If fuel contains water, it is easy to see the fuel below it in the bottle, like the fuel or the gas in the container removed whenever it has become able to do so at a few moments.
When the carbonize has grown out, find a perfect working area, Philips # 2, a range of Torx drivers, a sharp edge at a low height and a bottle of carburetor cleaning and how to cleanse the Carburetor on the ground directly.
Although the differences between 2-and 4-stroke carbohydrates are significant.
The following tips should only discuss the basic principles of 2-and 4-stroke carbohydrates.
In case you need additional detail specifically for the bike you are filming, make sure that an OEM Service Manual is correctly checked for specific subtleties when the carbonize is removed, reassembled and modified.
1. In a working area, all the vents and flood tubes should be removed, replaced if it appears colorful, broken, smashed, rough or eaten, while also monitoring the steering of the tank, just like any component connected to the carburetor.
2. Now, detach external captors or solenoids just like you take the stifle part from and out of the carburetor body by unthreading the unclogger.
3. Instead, string the screw on two strokes, or fuel tap moderate speed on four strokes to be positioned softly while taking special note.
Remove the screw and spring while carefully taking into account the presence of anything, flimsy level washing machines or o-rings below and over the spring.
4. Now remove the screws and make sure we have the bowl and search the inside areas of the carbohydrate.
Note: if the bowl seems to be stuck, first eject the pipe, use the screwdriver handle and slowly rap from the side of the container.
It will see as often as you can, and the bowl gasket duty will be completely broken, without harming the gasket.
5. With a bowl expelled, remove the pivot pin, boot and needle, examine each part for damage and carefully consider the boot and the needle tip of the Viton for injury.
With the bowl expelled. A broken boom can either retain weight and fall, or these boys sporadically load the increase when they are clean with petrol.
The fuel gulf needle Viton tips must be carefully observed because they can sporadically trigger torrents.
Still, both cases also create flood problems that can only rectify by removing the bow or needle and bench, since no sections can replace.
6. First, remove the plastic puzzle (if you have a chemical problem), then eject the essential fly (in focus).
Remove the pilot stream at that stage (maybe an opening involving a small, hard border screwdriver).
These planes are the superstars so that the gaps in these planes are visible through the use of clean, compacted carburetor air; ensuring that you can see the light in the holes.
Note: If you are having trouble clearing the pilot’s focus point, take the wire out of an overhead brush and use this to clean up the area carefully, avoid being too aggressive otherwise you can make an overly rich fuel mixture happen.
7. Use a dispersed carburetor cleaner (accessible from any car parts store) of compacted air when the carbonized
How to clean a dirt bike carburetor without removing it?
So basically you to know that how to clean a carburetor withour removing it. To clean a dirt bike carburetor without removing it you first have to remove the bowls from the bottom of the carburetor. When you finish removing the bowls use carburetor cleaning materials such as spray inside it. Take a break for few minutes and again spray the cleaner so that whole area inside it is covered. Finally you need to place the bowls and check the bike by starting it.
Conclusion
If you have done all the mentioned steps correctly with the right understanding related to the context, then you successfully Clean Your Carburetor and Good to Go!

")

")

