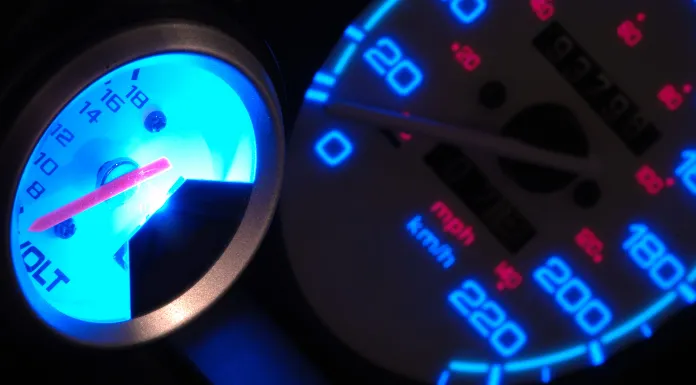
When a motorcycle gauge gets old, it can stop functioning. If your gauge stops working while you’re out for a long ride, it can be very frustrating. If you don’t pay attention to these five factors, you can get into some problems.
Your motorcycle fuel gauge may not work due to a wire disconnect with the battery, a damaged fuel float, an old and damaged fuel gauge wire, a malfunctioning sender unit, or the fault of the fuel gauge itself. Luckily, there are a few things that you can check to diagnose the problem.
In this blog post, we’ll look at five common reasons why your motorcycle fuel gauge might not be working—and how to fix them.
Reasons For the Fuel Gauge Not Working
Here in the following, you will see five reasons that can trigger problems with the fuel gauge. So let’s see those.
1. The Fuel Gauge Wire Is Not Connected to the Battery
One of the most common reasons a fuel gauge stops working is that the wire connecting the gauge to the battery has come loose.
This wire is responsible for sending power to the fuel gauge, so if it’s not connected, the gauge won’t work.
2. The Fuel Float Inside the Tank Is Damaged or Stuck
Another common reason for a broken fuel gauge is damage or corrosion to the fuel float inside the gas tank. The fuel float is a small device that rests on top of the gas and sends signals to the fuel gauge to let it know how much gas is in the tank.
If this float becomes stuck or damaged, it can cause problems with the fuel gauge. You’ll need to remove the float from the tank and clean it or replace it to fix this problem.
3. The Fuel Gauge Wire Is Old and Damaged
If your motorcycle’s fuel gauge is not working correctly, it may be because the wire that sends readings to the gauge is damaged or has expired.
Over time, exposure to heat, cold, and moisture can cause damage to the wire that connects the fuel gauge to the battery. This damage is often difficult to see with the naked eye, but it can cause problems with how the gauge works.
If you suspect that this might be the problem, the best thing to do is to wire an entirely new one—this is a relatively inexpensive fix.
4. Problem in the sending unit
The most common reason is a problem with the sending unit. The sending unit is in the fuel tank, which consists of a float that rises and falls with the fuel level.
As the float rises, it activates a switch that sends a signal to the gauge. If the switch is not working correctly, the gauge will not receive the signal and will not be able to display the amount of fuel remaining accurately.
5. Uncalibrated fuel gauge
If the gauge is uncalibrated, it may give false readings, leading you to believe that you have more fuel than you do.
In addition, if the gauge is faulty, it may give inaccurate readings or fail to work altogether. As a result, you could quickly end up stranded on the side of the road with an empty tank.
How To Fix the Fuel Gauge Issues
Fuel gauge fixing is not as technical and complex as other motorcycle parts. Any average rider can fix this problem with the essential tools in their parking garage.
Let us see the solutions below.
1. Calibrating the fuel gauge properly
First, you need to open the speedometer covers and ensure the fuel tank has no fuel inside. Next, you must remove the fuel gauge/sending unit from the tank.
To check whether the fuel meter is giving you the correct reading, you have to turn the ignition key off the bike. And then, you can set the fuel level gauge to the maximum. It would be best to do the same for the empty meter because it might give you the incorrect reading in the empty position bar.
The fuel meter reading is not right now; you can remove the needle from your bike’s fuel meter. Afterwards, take the fuel level gauge to a vacant position. You will also take the gauge into full position. While holding the fuel gauge position, you can place the needle in the same position as an empty or full position inside the fuel meter.
For example, keep the meter needle in full position if you set the fuel gauge in full position. And then, slowly release the fuel gauge, and you will see the needle go down to the empty bar. Repeat the same process by setting it to the empty position and checking if it works correctly.
If the result is good, that means it has been calibrated correctly.
2. Install new fuel gauge level
In most cases, the fuel gauge level change will be similar regardless of the motorcycle brand.
You can start by making the fuel tank empty. Make sure to remove the fuel line too. Then turn the pet cock into the reserved indicator.
You can remove the petrol tank from the main body by removing the bolt attached to the motorcycle frame. Then it would be best if you disconnected all the wires and connectors of the fuel gauge.
Pick a clean area where you can keep the petrol tank’s upper side on a towel to prevent scratch marks. You will see the fuel level gauge right under the tank. Removing the fuel gauge level is not a big deal.
All you have to do is move the bolts, but keep in mind the direction of the wire so that you can put the new fuel level gauge appropriately inside the petrol tank. Installing it in the wrong direction can give you a false reading of your motorcycle’s fuel meter.
While removing the fuel level gauge, try to be slow and gentle because the rod attached to the float has a bending design.
You must put the new fuel gauge in, ensure the gasket is in first, and then put the float in. It might damage if you forcefully insert it or do it in the wrong direction.
Earlier, I told you to remember the wire direction. Once the bolts are back in place, tighten them diagonally, but not too tight, so they don’t break. Afterwards, fill the tank with petrol and inspect for leaks; if any, you may need to look at the gasket.
Note: Installing a new fuel gauge will also solve the problem of a damaged or stuck fuel float. And also the problem of sending units.
3. Connect the fuel gauge wire to the battery
A motorcycle to have its fuel gauge wire disconnected. It’s a pretty common occurrence. If you find yourself in this predicament, don’t worry, it’s easy to fix. All you need is a pair of pliers and a screwdriver.
First, locate the positive and negative parts of the battery. Next, locate the corresponding terminals on your fuel gauge. Now, the pliers connect the wire from your battery’s positive terminal to your fuel gauge’s positive terminal.
Finally, use the screwdriver to connect the wire from your battery’s negative terminal to your fuel gauge’s negative terminal.
4. Change the fuel gauge wire if any broken part is found
Check if this is the case by ensuring the wire is securely connected to the sending unit. If it is, follow the wire to see if there are any frayed or broken sections.
You’ll need to repair or replace the wire if you find any damage. In some cases, simply replacing the wire will suffice. However, if the damage is extensive, you may also need to replace the sending unit.
5. Install new fuel gauge wire by replacing the old one
Fortunately, installing a new wire for your fuel gauge is relatively easy. The first step is to locate the connector that goes to your fuel gauge. It is usually located on the back of the gauge itself. Once you’ve found the connector, you’ll need to remove the old wire.
To do this:
- Unscrew the retaining screws and pull the wire out.
- Take your new wire and insert it into the connector.
- Route the wire so it will not interfere with other motorcycle parts.
Now, screw the retaining screws back in and turn on your motorcycle to test the new gauge. You can easily add a fuel gauge to your motorcycle with just a few quick steps.
Wrapping Up
By now, you must know why your fuel gauge might be disturbing and not working correctly.
Fixing the fuel gauge problems is not complicated; as you can see, they are not hard to fix. If you have the proper tools, it is a matter of time.
Hopefully, this article will help you to sort out the fuel gauge problem as soon as you get off your screen and get engaged in fixing the fuel gauge.
")
")


")
