You may believe that riding a bike without an indicator is no big deal, but in reality, you may have to deal with problems, particularly when it is foggy outside or during the winter.
I, too, was guilty of neglecting it in the past, but a serious accident taught me that I should never avoid even the smallest component of my motorcycle.
It would be helpful to turn your bike to the left or right so that the rider who is following you is made aware and there is no chance of an accident happening at that moment.
In the circumstance that the indicator on your bike is malfunctioning, let me walk you through the steps that can help fix the problem.
What is A Bike Indicator?
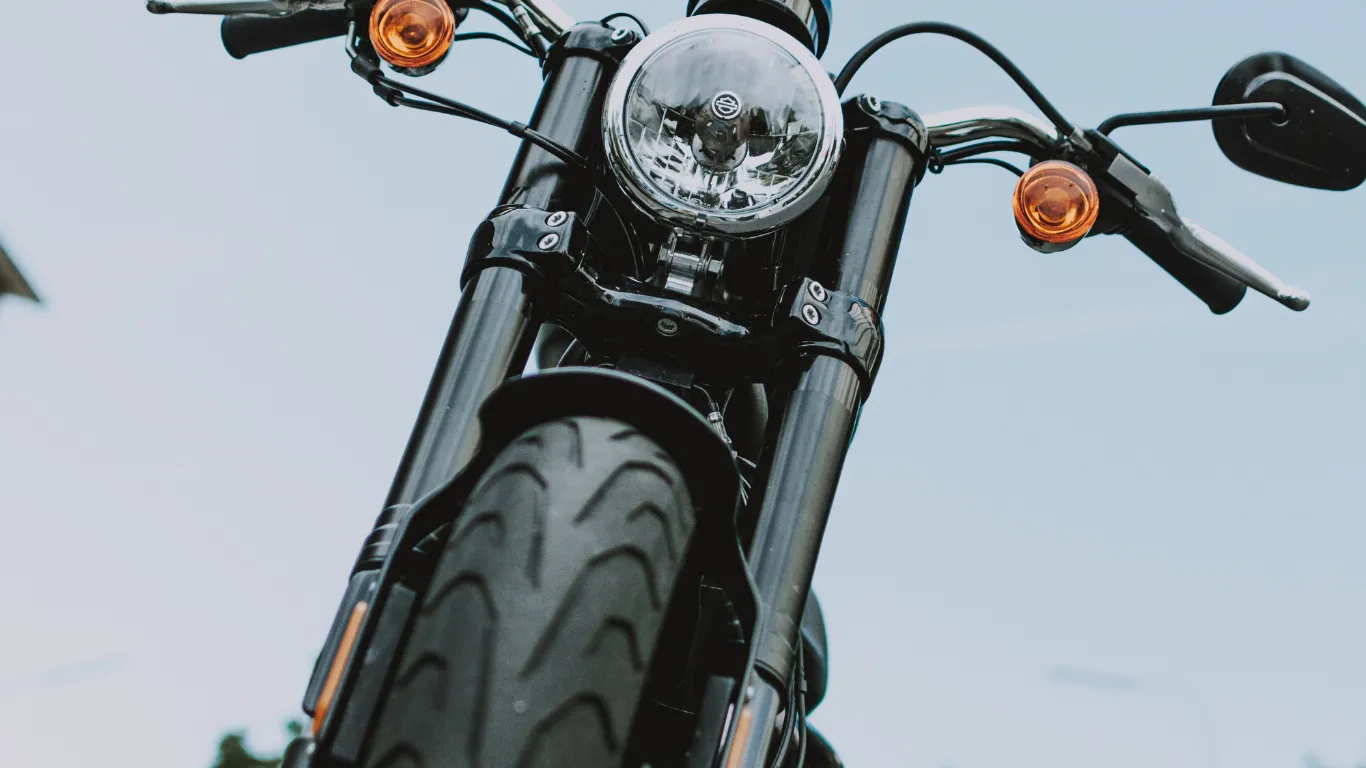
The indicator is a signal bulb that tells us which way the person in front of us is about to turn.
It can be used in any vehicle, including a car, a bike, or any other type of vehicle. If the person in front of you needs to make a right turn, then he will use this indicator to let you know he intends to do so.
For example, let’s say a bike rider is going in front of you and you are walking behind him at some distance, and the right-side indicator will turn on, and you will know that the person in front of you will turn on the right side, and you will be careful, which will reduce the risk of accidents, which is why the indicator has been used in every vehicle since it was first introduced.
The indicator functions according to the steering angle that is set on the handlebars of the bike.
When you press either the left or right indicator button, the corresponding side will begin flashing between the on and off position
What to Do If The Bike Indicator Does Not Work?
You need to be aware of these minor things so that you can test the indicator on your own if it stops working.
In the same way that your hands are important for the rest of your body to work, these signals are important for your safety on the road.
I have described some of the processes below so that you can determine what the problem is that is causing them to malfunction.
1. Check the battery
If your turn signals aren’t working, the first thing you need to check is whether the battery in your bike is dead or just low.
If your battery is dead or low, then the indicator will not work.
However, if the indicator starts working after you start the bike, then you will know that the battery is dead or low.
2. Check Fuse
If the indicator, horn, or brake light bulb on your bike suddenly stops working, the first thing you should do is check the fuse.
This is because the fuse is the point at which the wiring connects directly to the lighting.
If the fuse is blown, then everything that is connected to the wiring will stop working.
The new model of the bike will not even start without the battery, so you should check the fuse if it is blown.
3. Check the Indicator Flasher
This component of the indicator is of maximum importance because it is the flasher alone that controls the operation of the indicator.
If the flasher is broken, none of the other indicators will operate properly.
So, if none of your bike’s lights are working, you need to check the flasher.
You can also check it by pointing the flasher in a certain direction.
To accomplish this, you must first take a section of wire and strip it on both sides before proceeding to test the indicator.
To accomplish this, first turn on the predictor and then insert the wire you stripped into both of the wires where the flasher was installed.
4. Check the Indicator Switch
The fact that the switch isn’t working properly also contributes to the fact that the indicator isn’t working properly.
Dust appears to gather in the button of the indicator on the majority of the bikes as a result of water getting into the switch, as our observations have shown.
Which prevents it from turning on and, when activated, causes the indicator switch’s button to become stuck, necessitating a check of the switch in question.
5. Check the Wire Near the Handle
We’ve noticed that turning the handle over and over causes the wire near the handle to break on most of the bikes.
If the indicator, light, or meter light on your bike suddenly turns on, then you should check the wire that is attached to the handle once, and then tape it again.
6. Check the Indicator Bulb
Sometimes you check everything, but you forget to check the bulb, which is a mistake because there are times when all four indicators fail at the same time.
If the bulb does not work, this could be because water has allowed dust to collect in the lower portion of the bulb.
In this case, you will need to either check the bulb of the indicator or clean the dust.
How To Use Indicators In The Right Manner?
Whether it be a two-wheeler, a four-wheeler, or a commercial vehicle, the indicator has evolved into a device that is necessary for all of these types of vehicles.
Making turns without using indicators is a very challenging task. On the other hand, you won’t be able to make turns at night if you don’t have an indicator.
If your car doesn’t have an indicator, the chances of getting into an accident are much higher.
Many people, when faced with such a scenario, think about the predictor as being solely and exclusively used for making turns.
But this is not the case because it can also be used for a great deal of other things, all of which I will explain to you in a little while.
Use the Indicator Properly
The indicator is used primarily for turning in most situations. However, because there is a lack of information, a large number of people use it incorrectly when taking turns.
When there is a need to make a turn, for instance, a lot of people will turn on their indicators at the same time.
Traffic rules say that the indicator light needs to be on for at least ten seconds before the turn.
This gives the vehicle coming up behind you enough time to get back on its feet and slow down.
So, any time you want to use the indicator, you should turn it on at least ten seconds beforehand.
Use of Indicators On RoadSide Parking
Turning on both of your vehicle’s indicators is a good idea whenever you park on a road or highway, so that a driver coming up from a distance can see that there is a car parked on the side of the road.
In the same sense, it is of great benefit when used during the night.
Because vast tracts of the nation’s highways and roads aren’t equipped with adequate lighting systems in many places across the country, When conditions are like these, the likelihood of an accident happening is extremely low.
Use of Indicator In Winter and Fog
In many different countries, the winters are just as harsh as the summers, which can get very hot.
In many parts of the country, winter causes fog and mist to cover the land for ten to fifteen days.
The following situations can make driving on a highway or road dangerous; if this applies to you, drive carefully and check that all of your turn signals are activated.
The driver who is approaching from behind finds out as a result that there is already a vehicle in front of them. You’ll be able to improve your motorcycle riding skills if you follow these steps.
How To Fix The Indicator?
When your bike’s indicator breaks, it will likely become jammed with the assistance of the wire that is attached to it in the majority of cases.
In addition, the indicator will not shine brightly all the time, there is a constant influx of light into it.
Because of this, there is a significant amount of difficulty.
In such a situation, the answer to this problem can be found below in the form of its most simple explanation.
Change the indicator steam
First of all, you should have an ‘indicator steam’, if it is not there, then go to the automobile repairing centres to buy it.
It’s not so costly, you can have it with the minimum price of $1 to $2.
To change the indicator steam, you have to take out the side indicators completely.
So, remove the seat cover by opening the side panel. After this, you have to find the connection of the indicator, which is mostly on the back side.
And then disconnect the wiring which you want to open.
pull the wire downwards through the pipe
After this, you need to pull the wire downwards through the pipe.
You can also pull from the bottom, but remember that both the connectors should not go into this pipe at the same time.
Put them one by one, pull the wire from the bottom. After this, open the existing nut and take out the indicator.
fix the indicator
Now, a screw drive will be required to fix the indicator.
In some motorcycles, there is a lock at this place, so here also you should be careful, slowly pull a part of the indicator towards the outside.
It comes out easily, after that it simply takes out its wire.
There you can see a kind of hole in the indicator, from where you can pull out the wires one by one. After that, by taking out the rubber from the indicator stay, you need to clean it.
Install the indicator
Next step is to bring the indicator stay from the market which has to be installed at that space.
While proceeding, keep in mind that the pin given in it should be fixed at its place as the pin is used to fix it so that the indicator does not vibrate or move.
And then put the indicator in the stay. You can easily apply it by rotating it with your hand.
tighten up the connections
After this, don’t forget to tighten up the connections.
You have to insert the connectors inside the indicator one by one, but they should not be together.
After that the one part you took out, with which the bulb burns, add it again to the indicator.
And this screw has to be tightened. Now it is completely ready. Fix it in place on the motorcycle with the help of a screwdriver.
Conclusion
I hope you are familiar with the things that need to be checked if the indicator on the bike is not working.
You are now able to easily check the part to see if it is working properly on your bike.
If you are still having issues, please type your queries into the comment box below, and I will do my best to assist you.
I guess you enjoyed reading this article. If you are looking for more articles like this one, then subscribe to our newsletter.


")

